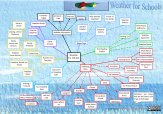
Basic Weather Apparatus
This page will give you a brief idea of what apparatus your will need to set up a weather station. Some of these items will go in you Stevenson screen, others will need to be in different locations. Information about using the instruments will be found in the Collecting Data section and on the various pages linked from the Collecting Data page.
To see more about where to put your weather station items see Setting up your Weather Station and More About Setting up your Weather Station. This page will also show you where to put your weather vane. To see what sorts of weather boxes can be used see the Weather Boxes page.
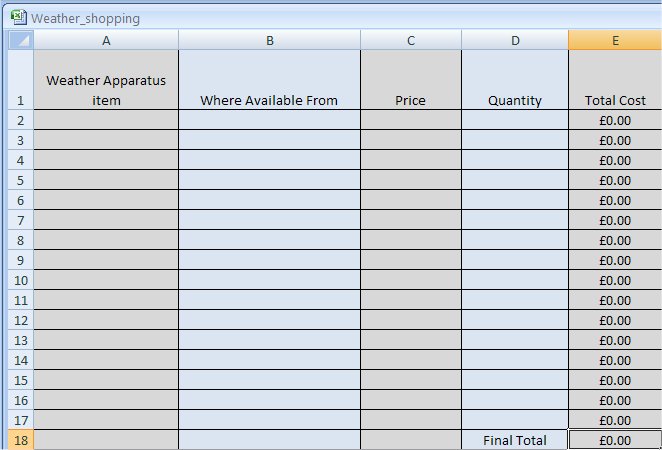
In most instances there are choices to be made when purchasing Weather apparatus. Price often needs to be weighed against accuracy. Availability can also be a factor in deciding what to use. You will also need to think about what you can fit inside your weather box. However, children do get a lot of fun from using real weather apparatus, and a well equipped weather station is a good motivator. Please do look at the Setting Up pages and the Collecting Data pages to see other apparatus which could be used. If you would like to use digital weather apparatus, please see the Weather and ICT page.
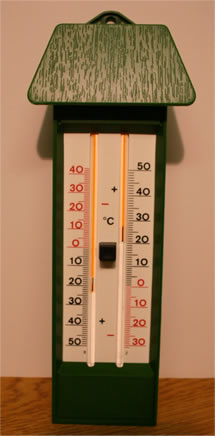
Maximum and Minimum ThermometerThese will provide three readings, the current temperature and the maximum and minimum temperatures since the thermometer was last reset. When buying one check that the indicator pins are not inside the liquid. (It is best not to buy one with mercury for use by children.) Also check that the resetting button works and that the indicator liquid does not have any gaps in it. These thermometers can often be bought from garden centres. Choose a thermometer with the Celsius scale clearly marked. Location - Weather box Priority - High In a search engine use the term 'maximum thermometer' to bring up sensible search results. See more on the Temperature Page. Recording the maximum reading is done in a special way. See important information here. |
 |
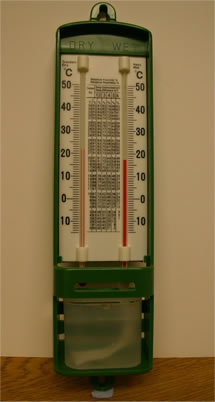
Wet and Dry ThermometersThis pair of thermometers provide wet and dry temperature readings. These are used to calculate humidity. One of the thermometers has a wick which goes into a small water container to keep the bulb of the thermometer wet. These are important readings, and are very interesting. The children will pick up an understanding that the drier the air, the bigger the difference in the two readings. Choose a non-mercury one with a clear Celsius scale. Location - Weather box Priority - Medium In a search engine use the term 'wet and dry thermometer' to bring up sensible search results. See more on the Humidity Page. |
 |
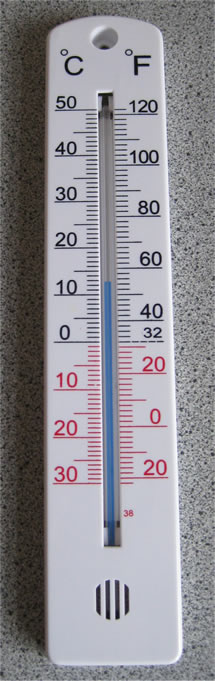
ThermometerA single thermometer will give the current temperature readings. This should have an easy-to-read Celsius scale. Check that the indicator liquid has not become separated before you buy it. Some thermometers, like the one on the right, have the minus readings in red to make it easier to read. This one also has a very clear scale, with a mark for each degree. If you are buying a thermometer like this one, it might be a good idea to get a set of ten so that they can be used for an experiment to see if temperature duffers in different locations. Location - Weather box Priority - High (unless there is already a Maximum and Minimum thermometer) See more about using and siting it on the Temperature Page. |
 |
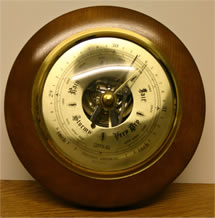
BarometerA clear basic aneroid barometer with other scales besides inches is the best to use. The one on the right may be a little hard for children to read. It should have a moveable needle which can be positioned on the current reading, before the barometer is tapped. This will help to see if the air pressure has gone up or down. Location - Indoors Priority - Medium See more about using and siting it on the Air Pressure Page. |
 |
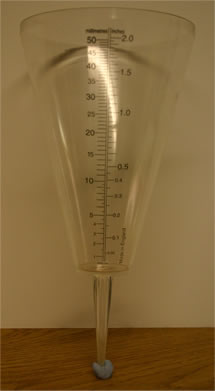
Rain GaugeThe most basic, and perhaps the easiest to read are see-through plastic funnels on a spike which can be stuck in the ground. These can often be found in gardening shops. They are cheap enough so that you can buy half a dozen so that you will be able to do experiments on rainfall in different locations. The one on the right is a good example. If a slightly better rain gauge is required, one made up of a measuring container in an enclosed plastic container with an inbuilt funnel is very good. These stop the rain from evaporating. (Home-made gauges are good as an activity, but not adequate for comparable data ) Location - in a clear space outside. Priority - High See the different types, and more about using and siting it on the Precipitation Page. |
 |
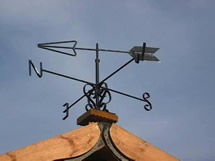
Weather VaneChoosing a weather vane is very important. The sail (at the rear) must have a larger surface area than the pointer. If it does not the pointer will point in the opposite direction to where the wind is coming from. (More details on this important point can be seen on the Wind Page.) Although it might be good to have a 'themed' weather vane, a functioning one is more important. Location - Clear space, high up Priority - High See more about using and siting it on the Wind Page. |
 |
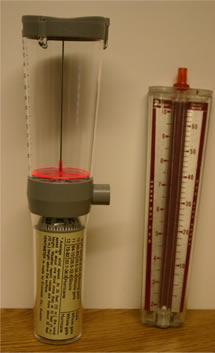
AnemometerAlthough the estimation of wind strength using the Beaufort Scale is very important, using an anemometer is a good motivator for young weather enthusiasts. The Ventimeter (left in image) and the Dwyer Wind Meter (right in image) have been excellent instruments for children to use. The development of cheaper digital equipment has meant that reading wind strength has changed somewhat (see the ICT Page). These can be obtained reasonably cheaply. If using these, be sure that you know what units of measurement you are going to use, and stick to the same each time a reading is made. Location - clear space Priority - Medium In a search engine use the term 'handheld anemometer' to bring up sensible search results. See more on the Wind Page. |
 |